Back to Blogs
Essential Steps for Motor Oil Leak Repair
You’re walking to your car with your morning coffee when you spot it: a dark, shimmering puddle right under where your engine rests.
TravelMechanic Team
April 28, 2026
9 min read
You’re walking to your car with your morning coffee when you spot it: a dark, shimmering puddle right under where your engine rests. Panic usually sets in immediately, but before you start budgeting for a massive engine oil leak, let’s figure out exactly what that spot on your driveway is trying to tell you. In practice, not every puddle means impending doom. Your vehicle relies on several different fluids to operate properly, and identifying the culprit is the essential first step toward a solution.
To accurately diagnose the situation, professionals rely on a simple method you can replicate at home using the 24-hour cardboard test. Sliding a clean, white piece of cardboard under the engine block overnight catches the evidence before it dries into the concrete.
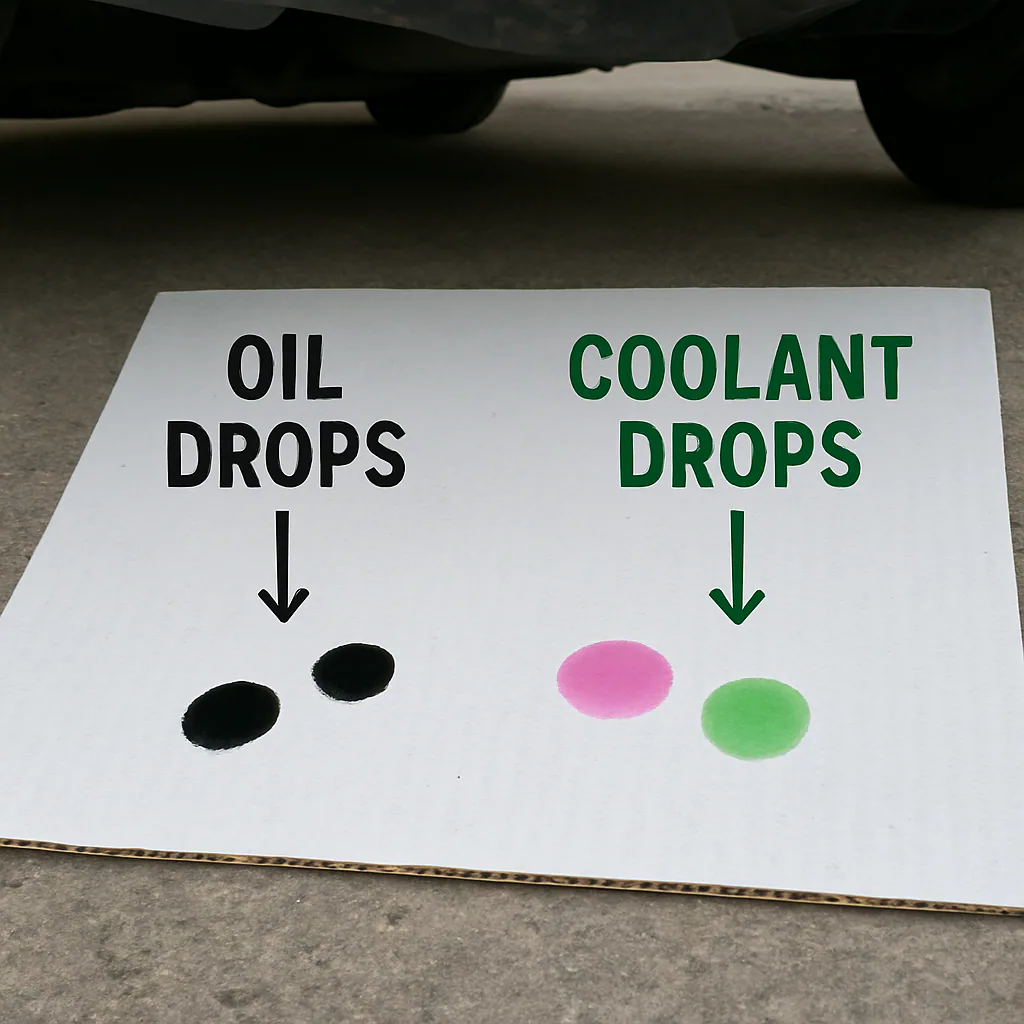
Industry data reveals that many suspected oil problems are actually just brightly colored coolant. True engine oil feels thick and slippery between your fingers—a property known as its viscosity—and usually looks light amber or dark brown. Once you confirm the fluid type, remember the "garden hose" principle: a pinhole defect might only drip slowly while the engine is off, but internal oil pressure forces fluid out much faster while you are driving.
Determining how quickly the fluid escapes dictates whether you need immediate motor oil leak repair or just a watchful eye. A minor stain that barely dampens the cardboard is called "seepage"—a slow, harmless sweating around old rubber seals that you can simply monitor. Conversely, a steady drip that forms a fresh puddle overnight is an active leak requiring a scheduled fix. Puddles that form within minutes are absolute emergencies, but by understanding these basic signs, you can confidently decide how to fix oil leak issues without feeling overwhelmed.
Blue Smoke and Acrid Smells: Recognizing Symptoms of Engine Oil Leakage
Sometimes your car warns you about trouble before a single drop hits the driveway. Understanding the symptoms of engine oil leakage means knowing if fluid is escaping outside the engine (an external leak) or sneaking inside the combustion chamber (internal consumption). Because you already know the difference between the engine compartment and the exhaust system, you can use your senses as your first diagnostic tools:
The Scent: A thick, burnt toast smell usually means an external leak is dripping directly onto blistering hot exhaust components.
The Sight: Dark, shiny "sweat" on the engine exterior warns of a slow external seep before it creates a major driveway puddle.
The Smoke: Noticeable blue smoke from exhaust tailpipe openings indicates internal consumption, meaning your engine is actually burning oil alongside its regular fuel.
Catching these early warning signs prevents minor seepage from turning into an expensive roadside emergency. If your senses point to an external drip rather than internal burning, the next step is locating the exact origin.
The DIY Detective: How to Find the Exact Source of an Oil Leak Using UV Dye
Tracking a fresh drip in a filthy engine bay is nearly impossible. Create a blank canvas by safely degreasing engine block surfaces with spray cleaner and a simple rag. This clean slate matters because engines use pressure-based oil flow. Much like a garden hose, a tiny seal defect might barely weep when the system is resting, but it pushes fluid out actively while the vehicle is running.
With the old grime gone, introduce fluorescent tracer fluid to the system. Using UV dye for leak detection is a brilliant, beginner-friendly diagnostic trick. Since you already understand how to add fluid to the oil fill cap, simply pour the small bottle of dye directly into that exact same opening. Let your vehicle idle for about fifteen minutes, allowing the mechanical pump to circulate the glowing mixture past every aging rubber component.
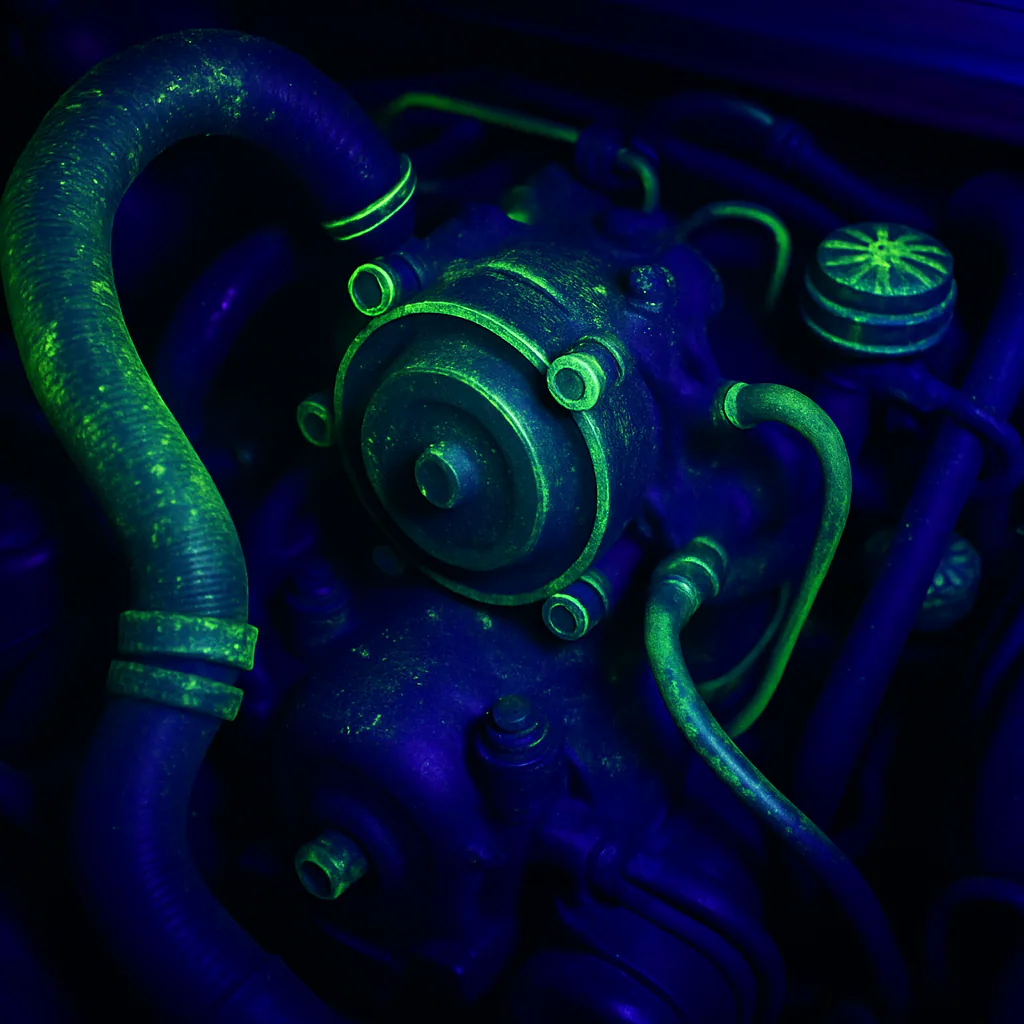
Finally, shine a specialized blacklight over the dark engine compartment to spot the escape route. A steady neon trail running down from the top indicates a standard gravity leak, while a glowing splatter near the bottom points to a high-pressure breach.
The Critical Safety Check: Is Your Car Safe to Drive With a Leak?
Staring at a glowing neon trail often triggers an immediate question: is it safe to drive with an oil leak? The answer relies entirely on your dipstick, which acts as a vital fuel gauge for your motor's internal safety. If the fluid remains between the safe markers, a minor seep won't leave you stranded. However, ignoring a dropping level leads to a catastrophic condition called oil starvation. Without a thick, slippery barrier protecting them, fast-moving metal components grind directly together, creating intense friction that can warp an engine in minutes.
Beyond simple lubrication, your vehicle needs this fluid to prevent dangerous hydraulic pressure loss. Much like losing water pressure in your home's plumbing, a system running dry escalates warning signs quickly. If a red oil can dashboard light illuminates or you hear a rapid metallic ticking noise, pull over immediately. The impact of low oil levels on engine health is irreversible once that metal-on-metal noise begins. Fortunately, not every puddle means a ruined car; simple bottom-end checks often resolve the issue.
The Five-Minute Fix: Tightening Loose Drain Plugs and Oil Filters
Before panicking over a spotted driveway, realize that your engine is basically a giant vibrating metal block. Over thousands of miles, this constant shaking causes vibration loosening, which can slowly back out threaded components and create a mess. A surprisingly effective oil leak fix often requires zero new parts and just a few minutes of your time. You can prevent an expensive diagnostic fee by inspecting these accessible spots first:
Drain plug
Filler cap
Dipstick seal
Stopping these drips comes down to proper gasket compression—squishing the rubber or metal seal just enough to block escaping fluids without crushing it. If the oil filter is to blame, give it a firm twist strictly by hand; using tools will pinch and ruin the delicate rubber ring. Conversely, tightening a loose oil drain plug requires a basic wrench to gently snug the metal washer against the pan. Once you have ruled out these simple bottom-end components, wet spots higher up on the engine block indicate a top-end issue.
Mastering the 'Tupperware Seal': Replacing a Leaking Valve Cover Gasket
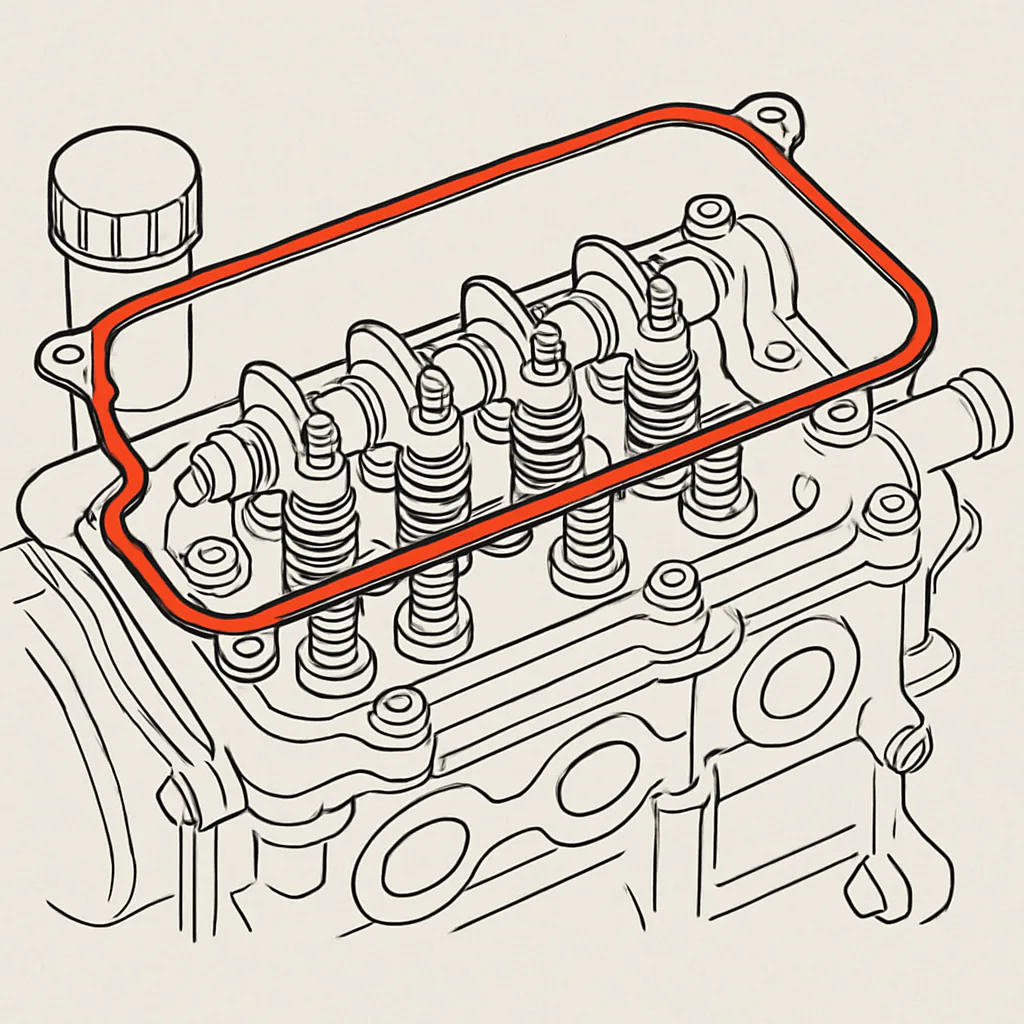
Catching a whiff of burning oil or spotting sludgy grime near your engine's top usually points to the valve cover gasket. Think of this part as an engine-sized Tupperware seal. Sitting atop the motor, this rubber outline traps oil inside. Unfortunately, constant heating and cooling—known as heat-cycling—eventually bakes the flexible rubber until it turns brittle and cracks. You might even find fluid pooling in the spark plug wells, a classic sign that motor oil leak repair is necessary.
Grab your socket wrench set, because replacing a valve cover gasket is a surprisingly manageable driveway project.
Clean: Wipe away perimeter dirt so nothing falls into the exposed engine block.
Remove: Unbolt the metal cover and peel out the old, hardened rubber ring.
Seat: Press the fresh gasket into the cover's groove. Wipe the engine's flat mating surface (the smooth metal where the two parts touch) until it is perfectly clean.
Torque: Tighten the bolts using a torque sequence—a crisscross pattern starting from the center outward—so the cover presses down evenly without warping.
Securing those bolts carefully ensures the fresh seal compresses perfectly, creating a durable barrier.
Chemical Cures vs. Mechanical Repairs: When to Use Stop Leak Additives
Staring down the auto parts aisle, pouring a bottled miracle cure into your engine seems vastly preferable to a weekend of wrestling with wrenches. An off-the-shelf oil leak fix usually relies on two chemical tricks: polymer seal swellers and viscosity modifiers. The swellers act like a chemical sponge, soaking into dried-out rubber gaskets and making them puff up to close the gap. Meanwhile, viscosity modifiers work like cornstarch in a thin soup, temporarily thickening the fluid to slow down any active dripping.
The hidden danger of these temporary band-aids lies deep inside your vehicle's plumbing. Motor oil must constantly flow through incredibly narrow channels to lubricate fast-moving parts, and introducing artificial thickeners into these tiny passageways risks creating a catastrophic clog. When weighing a quick stop leak additive vs professional repair, remember that replacing a simple gasket is significantly cheaper than replacing a starved, seized engine.
High-Mileage and Synthetic Oils: Choosing the Right Lubricant for Older Seals
If you recently upgraded to a premium fluid and suddenly noticed new driveway puddles, that fresh oil might actually be working too well. When weighing synthetic vs conventional oil for older engines, the primary difference involves molecular size. Synthetic oil is engineered with ultra-uniform, tiny molecules. While this provides superior internal protection, these incredibly slick molecules easily slip through microscopic cracks in aging rubber that chunkier, mixed-size conventional oil molecules would simply bridge over. Therefore, synthetic oil doesn't create leaks; it just reveals pre-existing ones faster.
Rather than downgrading your oil, switching to a specialized formula is an excellent preventative step. Using a high mileage oil for sealing leaks introduces seal conditioners into your engine. Think of these conditioners like a moisturizing lotion for dried-out rubber, helping brittle gaskets regain their original flexibility.
Standard oil: Focuses purely on reducing friction between tight, new components.
High-mileage oil: Actively softens aging seals and utilizes a slightly thicker viscosity to fill wider clearances in worn engines.
When fluid changes can't stop the dripping, it is necessary to evaluate heavier mechanical repairs.
The Heavy Hitters: Navigating Oil Pan and Rear Main Seal Replacements
Peering under your car, the engine's lowest point is the oil pan, a metal bowl holding your fluid reserve. When its rubber rim wears out, oil drips directly onto the pavement. While a weekend mechanic might tackle this on an older truck, modern vehicles often route exhaust pipes or suspension parts directly beneath it. Because removing these heavy obstacles takes hours, your oil pan gasket replacement cost is driven by a high labor-to-part ratio. You are heavily paying for the mechanic's time, not the twenty-dollar rubber piece.
Further back, right where your engine bolts to the transmission, lies a much trickier culprit. Inside this tight junction sits the rear main seal. This is one of the essential crankshaft seals designed to keep oil securely inside the spinning motor. If fresh puddles constantly form near the middle of your vehicle, this heavy-duty ring has likely failed. Because reaching it requires completely dropping the transmission, the rear main seal replacement procedure is strictly a professional job requiring specialized garage lifts.
Deciding whether to tackle or outsource these bottom-up repairs depends on accurately identifying the true source. Once you wash away the old, baked-on grime, tracking the path of the fluid becomes incredibly simple.
Finishing the Job: How to Degrease Your Engine and Monitor for New Leaks
Driving your vehicle immediately after tightening the final bolt might give you a scare if you suddenly smell burning fluid. Don't panic—this is usually just residual burn-off, where old spilled oil evaporates off hot exhaust pipes. To confirm your repair actually held, cleaning engine oil residue after fix is mandatory. Spray a standard automotive degreaser onto the cold metal, let the foam lift the grime, and rinse gently with a regular garden hose. Properly degreasing engine block surfaces provides a blank canvas, making any actual, fresh leaks instantly visible rather than blending in with old messes.
With a perfectly clean engine, you must establish a tracking habit to guarantee long-term success. Follow this simple monitoring routine over the next two weeks:
Drive test: Take a normal 20-minute trip to build operating pressure, then park over a clean piece of cardboard.
Visual log: Check that cardboard every morning for fresh drops, noting their exact size.
Dipstick check: Pull the dipstick weekly to verify your fluid level remains steady.
Mastering these basic checks establishes a clear, step-by-step maintenance strategy for your vehicle.


